So far, we’ve covered how to start up SQLPS and some of how we can navigate within the provider. These are the first few steps along the path of using SQL Server and Powershell together. Next is to understand how it works behind the scenes. SQLPS makes a lot more sense once you understand how it’s constructed.
A key concept of Powershell is that everything in it is an object, specifically a .Net object. Everything. I stress this to new users of the language because so much of Powershell’s strength comes from this foundation. For people using other scripting languages, such as Korne or Bash, artifacts are simple strings or integers. Objects add an entirely new level of functionality to the language, giving scripters access to properties and methods for their scripts.
To see what the SQL provider is built on is a simple matter of using Get-Member to interrogate the components:
Get-ChildItem 'SQLSERVER:\SQL\localhost\DEFAULT\databases' | Get-Member
Note the object type, a Microsoft.SqlServer.Management.Smo.Database object. This is part of the SQL Server Management Objects (SMO) .Net library, an API that’s been around since 2002. What does this mean? That the way SQLPS interacts with SQL Server and its components is the same as if we were using almost any other SQL Server tool out there, including our age old standby, SQL Server Management Studio. There’s not strange voodoo magic going on here.
Because of this foundation on objects, we can leverage their methods and properties for our specific purposes. For example, let’s do a directory lookup on the path we use above:
dir 'SQLSERVER:\SQL\localhost\DEFAULT\databases'
Unsurprisingly, we get a listing of our databases, but the output columns are predefined. This is baked into formatting definitions within the provider, displaying these properties by default. That’s key, all the displayed columns are properties of the SMO database object. So what if we wanted to show different columns? It’s just a matter of displaying the properties we want:
dir 'SQLSERVER:\SQL\localhost\DEFAULT\databases' | Format-Table name,createdate,lastbackupdate
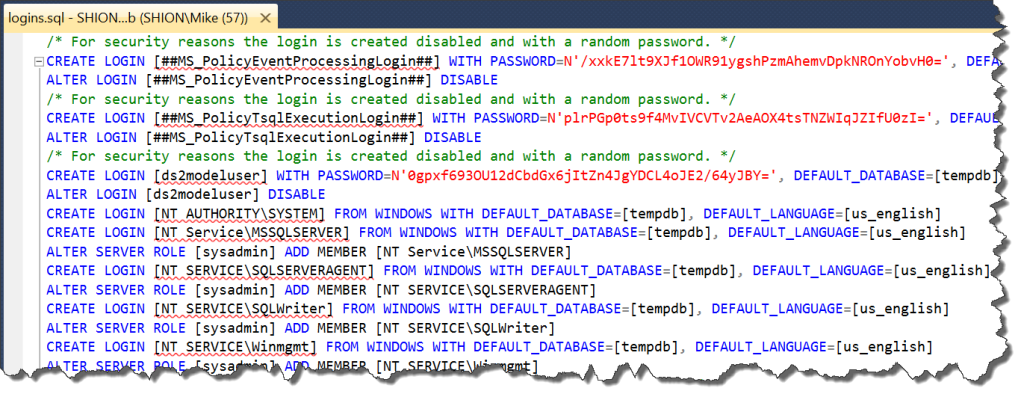
We could then start to leverage the methods to automate many of our tasks. Say, for example, you wanted to script off your instance’s logins. While we could use the script task within management studio, we could also use Powershell and the SMO’s .Script() method to accomplish the same task:
dir 'SQLSERVER:\SQL\localhost\DEFAULT\logins' | ForEach-Object {$_.Script() | Out-file C:\TEMP\logins.sql -Append}
Note that this is exactly the same as if you had scripted these objects out in SSMS. This is because both tools are using the same .Net libraries under the hood. There’s very little difference between these tools, except the interface. This means that, as you make the transition from one tool to the other, you can expect similar behaviors.
Properties and methods are the secret sauce of Powershell and open up many avenues for automation and script writing that we’ll explore as we continue this series. The emphasis here is to understand that using the SQLPS provider isn’t a whole different from other tools you’re used to using. Next up, we’ll start talking about some of the standard Powershell cmdlets available to us in the SQLPS module and how we can use them.


 I’m tweeting!